RECESS-IT Niche
Installation Instructions
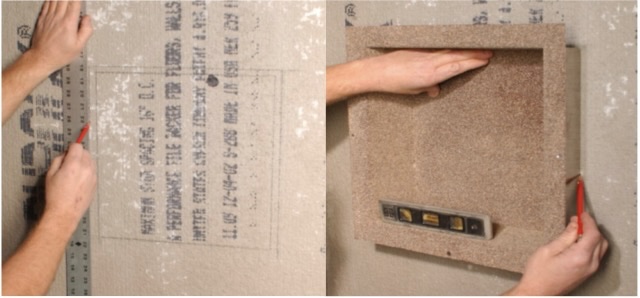
STEP 1
Place Recess-It unit level at desired location with flange facing out.
When positioning the unit, be careful not to interfere with any
structural wall framing members. Trace perimeter of Recess-It on
substrate and then place unit aside. Enlarge marked layout by 5/8”
on all sides and cut out.
|
 |
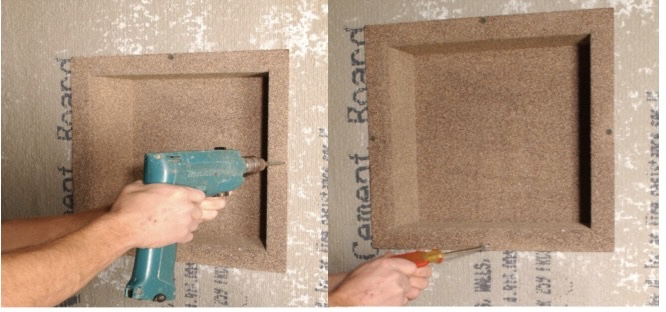
STEP 2
Add a continuous bead of adhesive caulk along mounting flange,
then secure to wall cavity using the supplied wall fasteners.
(Galvanized roofing nails may be substituted.) Use a hand
screwdriver or a power screwdriver on a low-resistance setting to
tighten all fasteners. DO NOT OVERTIGHTEN
|
 |
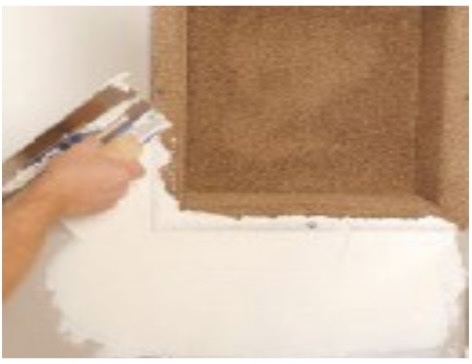
Important!
Thickness of Recess-It mounting flange should be minimalized to provide a flush
wall surface for the finish tile (or other finish material). In some cementitious
substrates, you may be able to grind the perimeter of the cut-out for the width and
depth of mounting flange prior to installation; otherwise, install unit, and then use
bonding material (thin-set/mastic) to “feather” the edge of the unit for a distance
of 8”-12” and allow to set firm prior to continuing with finish tile.
|
 |
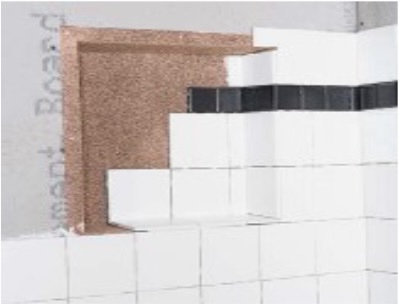
STEP 3
Finish as desired using bonding
products suitable for finish
surface material being applied.
Note: All Recess-It products have
a predetermined slope for the
bottom surface. This may be
reduced or enhanced by using a
thicker bed of bonding material at the front or rear of horizontal plane
as necessary. Do not adjust slope to angle backward toward
rear of unit.
|
 |
Optional Installation: Floating-Shelf

Place the Floating Shelf directly on the top edge of the
selected tile course. Apply surface bull-nose tile (SBN)
or other finish material to the top and bottom of the
Floating Shelf by using thin-set or mastic to
“sandwich” the shelf unit. Allow the front edge of
applied tiles to extend 1/8” minimum to allow for grout
coverage of the shelf.