BETTER-BENCH
Installation Instructions
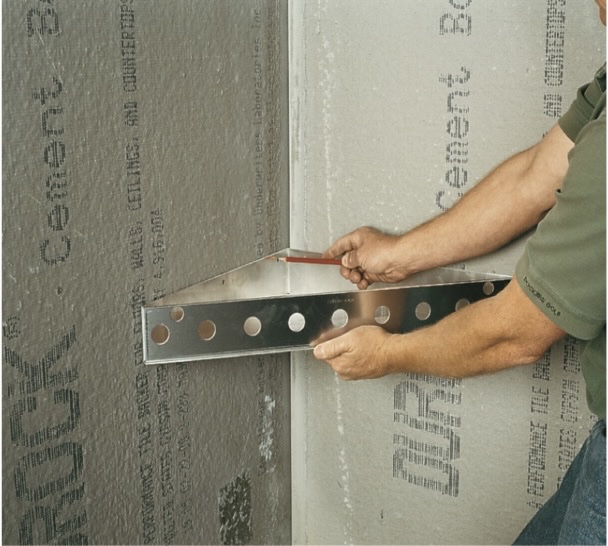
STEP 1Position Better-Bench at desired location and mark mounting holes on substrate. Using a 3/8” masonry bit, drill marked locations completely through substrate. Place fastener sleeves in drilled holes and secure by tightening screws with a hand screwdriver. If blocking or framing is encountered, discard hollow wall anchors and use provided wood STEP 2Remove screws and inject a small amount of adhesive caulk in each mounting hole. Reposition Better-Bench, insert fastener or wood screws and tighten completely using a hand screwdriver. |
 |
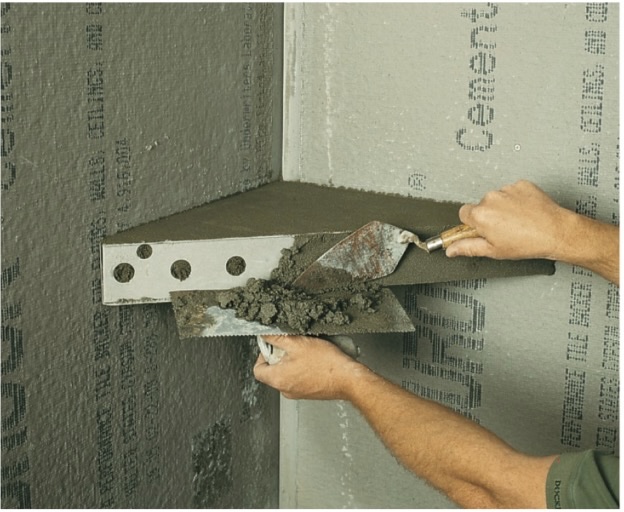
STEP 3Place a continuous bead of adhesive caulk along the top edge of the Better-Bench at wall surface. Apply stiff mortar to completely fill bench unit, allowing for surface drainage by building up mortar in back corner and screed even with upper front lip of unit. Pack mortar tightly, allowing the mortar to press through the front holes. Fill any voids in front channel and screed mortar flush with upper and lower lip of channel. |
 |
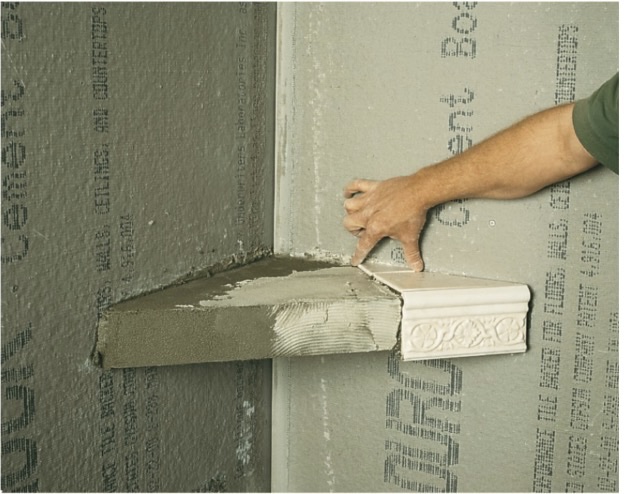
STEP 4Tile and grout the top and face of the Better-Bench as desired. |
 |